Integrating with DocuSign using Custom UI Extensions
1. What's it about?
One of the key strengths of the Pipedrive Developer Platform is that it allows you to build deeper integration into the product. With the Custom UI Extensions feature, users no longer have to switch between tools to accomplish their tasks. Often, this brings significant value addition to the integration in terms of time saved and increased productivity.
Let's consider the case of Contract Management, and more specifically, e-Signatures. This involves working with documents and agreements that need to be signed digitally by users. It is also an important use-case in the context of CRM Sales Enablement. With the help of the Custom UI platform feature, one can build an app that brings the digital signing experience natively into the Pipedrive product without having to switch between tools.
This use-case can be extended to Proposal, Document / Content Management, and CPQ (Configure, Price, Quote) integrations as well.
What you'll learn
- A High-level overview of the integration.
- Understand how DocuSign and its APIs can be used for digital signing.
- Build a Pipedrive App that integrates with DocuSign APIs.
- Use Custom UI Extensions feature to list the templates inside Pipedrive.
- Preview templates and send them to recipients for e-signature.
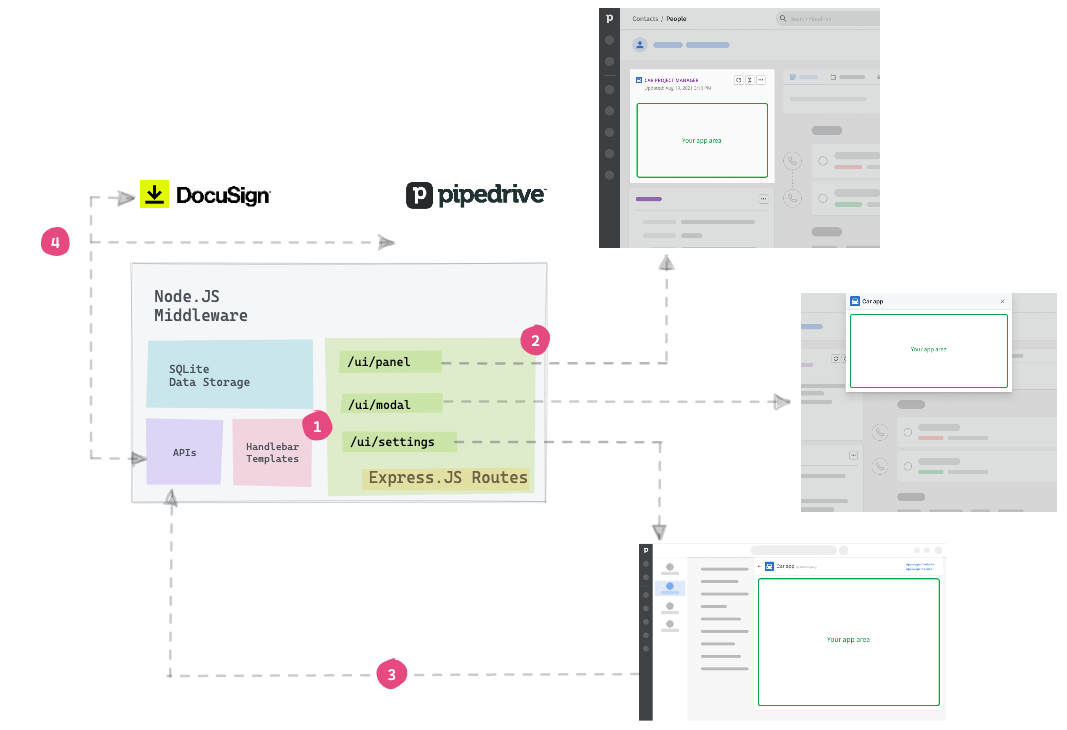
2. High-level overview
On a high level, we will be integrating with DocuSign to show the list of templates within Pipedrive. The templates are basically documents (lease, rental agreements, etc) that can be reused several times. The user of the app can see these templates, preview / edit them and send it to the contact person of the deal to obtain the signature. Since these are templates, we can supply variables based on the deal information and make it a bit more dynamic.
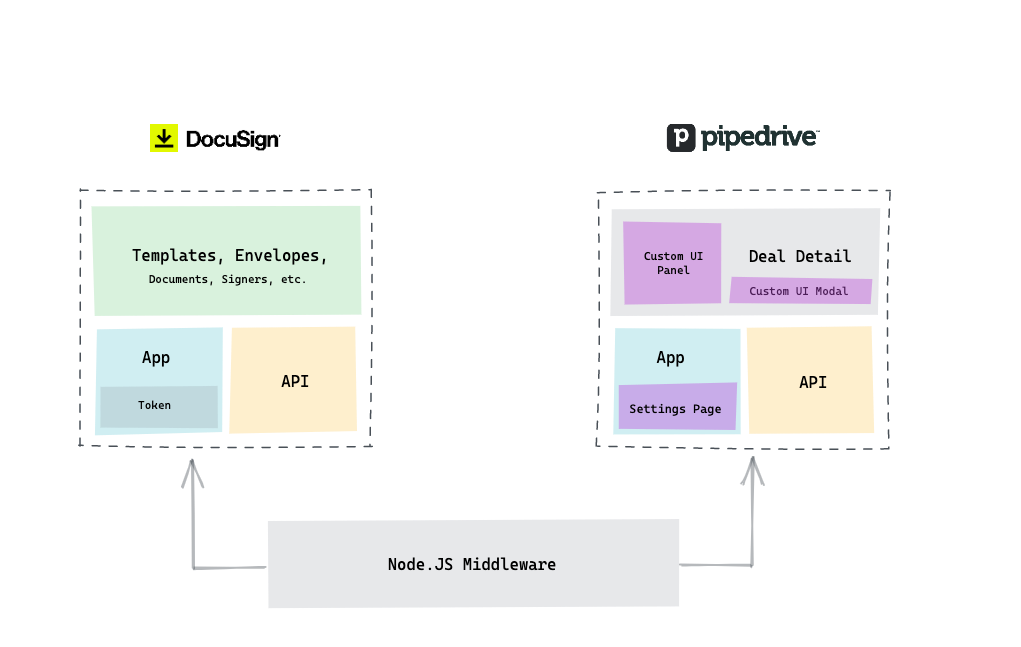
To achieve this use-case, we will be making use of REST APIs (from DocuSign & Pipedrive) via OAuth apps. On the Pipedrive side, we will be leveraging the Custom UI Extensions feature to display the app within Pipedrive (Deal Details section to be specific). We will be making use of the following Custom UI features:
Panel - Used for displaying the list of DocuSign templates. Technically, this is an IFrame that renders an external page. Each template item can be previewed and sent for signing.
Modal - The Modal is used to show the preview of the template. You can also make some corrections to the template before sending them out.
Snackbar - This shows the status of the operation. Appears as a small message in the bottom left corner.
App Settings - A separate page to configure settings related to the account after the installation.
The app is based on NodeJS and uses the Pipedrive SDK for authorization. You can also access the sample app from the Pipedrive Sample app repository.
3. Setup DocuSign: Demo Account, Templates, and Credentials
DocuSign offers a free Developer Account that can be used to test our integration. Make sure you create a new account and activate the same. Once your developer account is activated, you can login to the newly created account and it should look like this picture below.
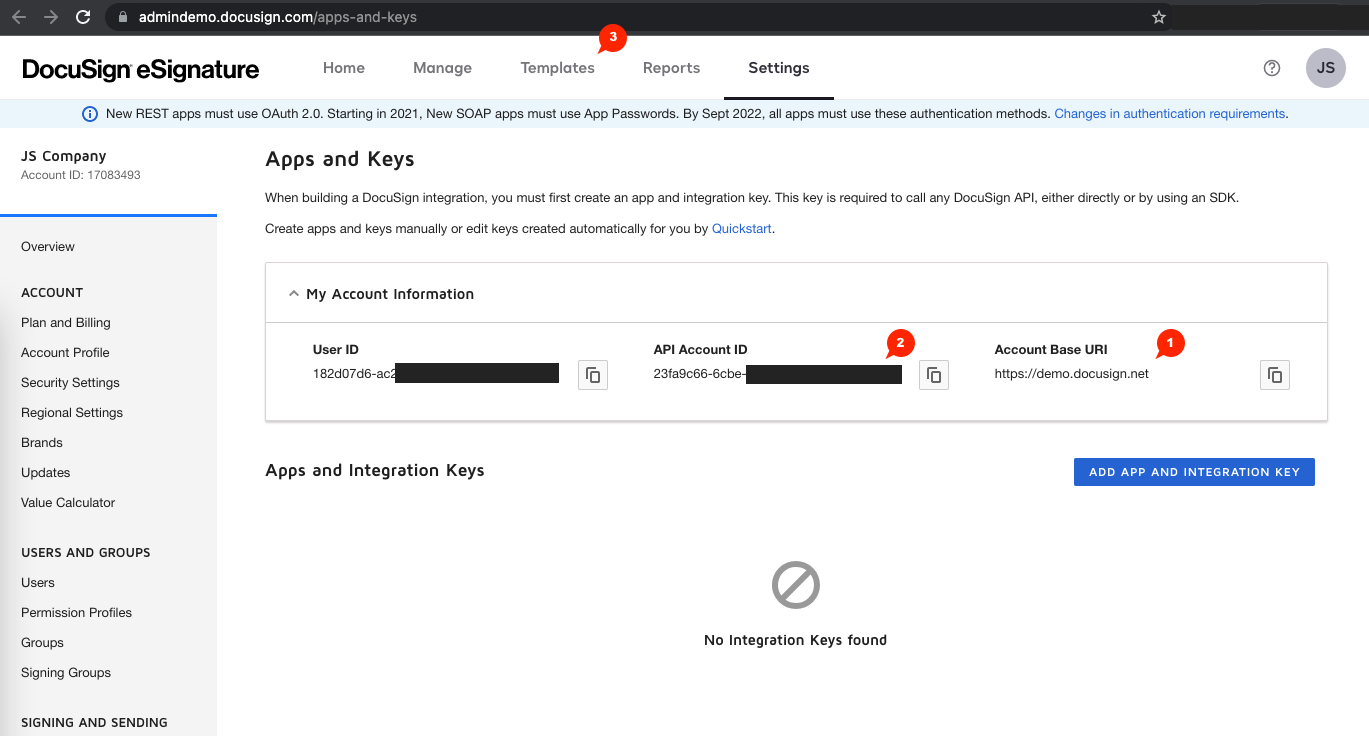
Keep note of the API Account ID as it will be required in our app at a later stage. DocuSign also offers a temporary token generator that lets you generate a temporary OAuth Access Token. This would be handy for us to test the APIs initially.
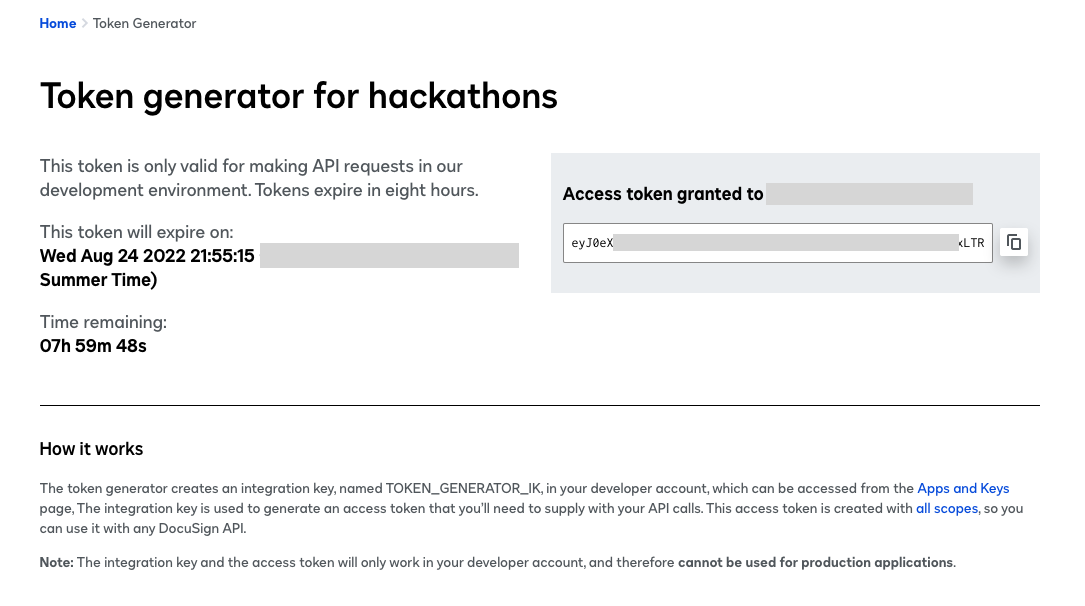
The DocuSign temporary OAuth token and Account ID will be the inputs for our App Settings page. Once you have the details noted down, you can proceed to create a couple of templates. The templates that you create here are the ones that will appear in the Custom UI panel later.
4. Setup Pipedrive: Sandbox Account and OAuth App
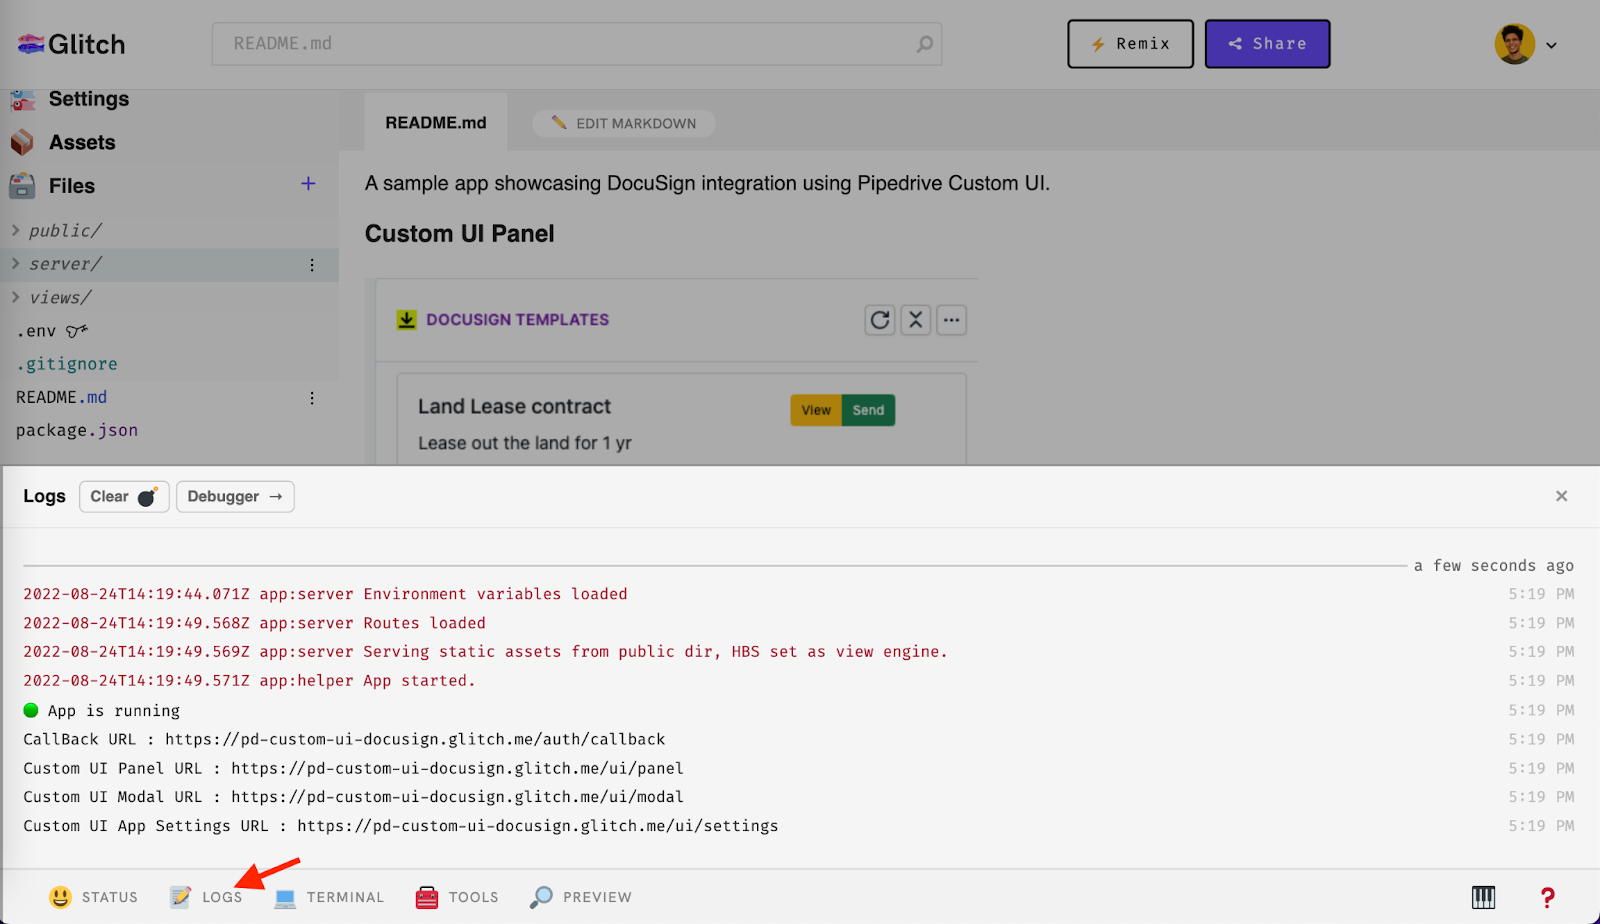
To get started with the Pipedrive App, make sure you have a Sandbox Account with the Developer Hub enabled. You can make use of the Glitch App as a boilerplate to build your app. Click on the button below so that it creates a personalized copy for you.
Check the Logs section of the Glitch app to find the Callback and Custom UI URLs. They will be required for the app that we will be creating in our sandbox account. To register an app in the Pipedrive account, please follow these steps. For now, it is sufficient to have only the Basic and Deals (Read-Only scope).
Specify the Callback URL during Pipedrive app creation. It should be in this format:
https://[YOUR_GLITCH_APP_NAME].glitch.me/auth/callbackSimilarly, in the Custom UI Extensions section, create a Custom Panel. You can provide the Panel URL shown in the Logs section as the IFrame URL. Choose the panel location as Deal Details.
https://[YOUR_GLITCH_APP_NAME].glitch.me/ui/panelNext, you need to create a Custom Modal by providing the appropriate modal link. However, in this case, you don't have to pick any entry point. Keep note of the Modal ID as it will be used for invocation.
https://[YOUR_GLITCH_APP_NAME].glitch.me/ui/modal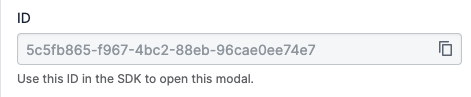
The same procedure applies to the App Settings section. In our case, the 'Type' of the App Settings page should be specified as Custom UI. The URL for App Settings looks like this:
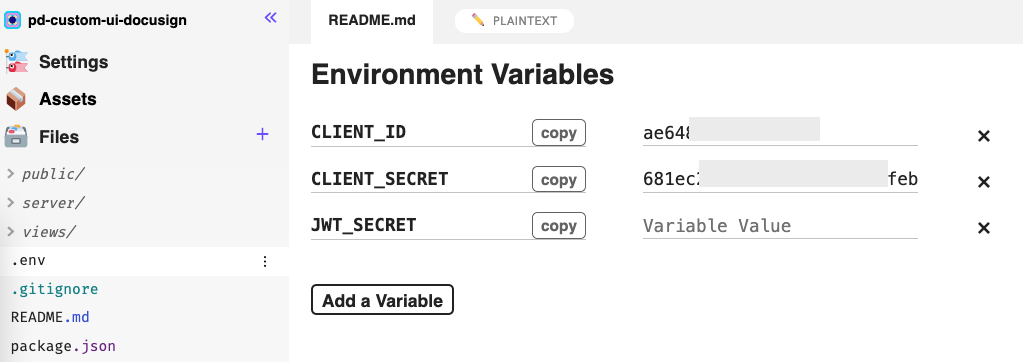
https://[YOUR_GLITCH_APP_NAME].glitch.me/ui/settingsOnce you have provided the necessary details, scroll to the top and hit the Save button on the top right corner. Re-open the newly created app and note down the Client ID and Secret details. They need to be specified in the .env file of our app.
To summarise, we did the following:
- Created a Pipedrive Sandbox Account.
- Remixed the Glitch boilerplate app.
- Created an OAuth app in Pipedrive with Glitch App's callback URL.
- Specified the IFrame URLs for the Custom UI panel, modal, and app settings page.
- Took note of the Client ID and Secret details for the newly created OAuth app.
5. Building the Custom UI: Overview & App settings
Now that we have both the DocuSign and Pipedrive accounts configured, we can leverage Custom UI extensions to integrate DocuSign deeply into the product. On a high level, all Custom UI locations are tied to an IFrame URL. In our app, we make use of Express.JS with Handlebars Templates to serve the UI. Also, every time a Custom UI is rendered, context is passed on via the query parameters. This helps us to identify the 'account' and the 'user' working on any Custom UI location. The query parameters are also accompanied by a JWT token generated based on the secret (if provided).
Any operation performed in the Custom UI is handled using Javascript in conjunction with custom APIs written in our app. These APIs are used to list the templates, send documents, etc. During the time of installation, we create an account with the basic details in our database. We are making use of the Sequelize ORM to connect with an SQLite database. The /server/routes/auth.js contains the logic required for authorization and JWT token verification.
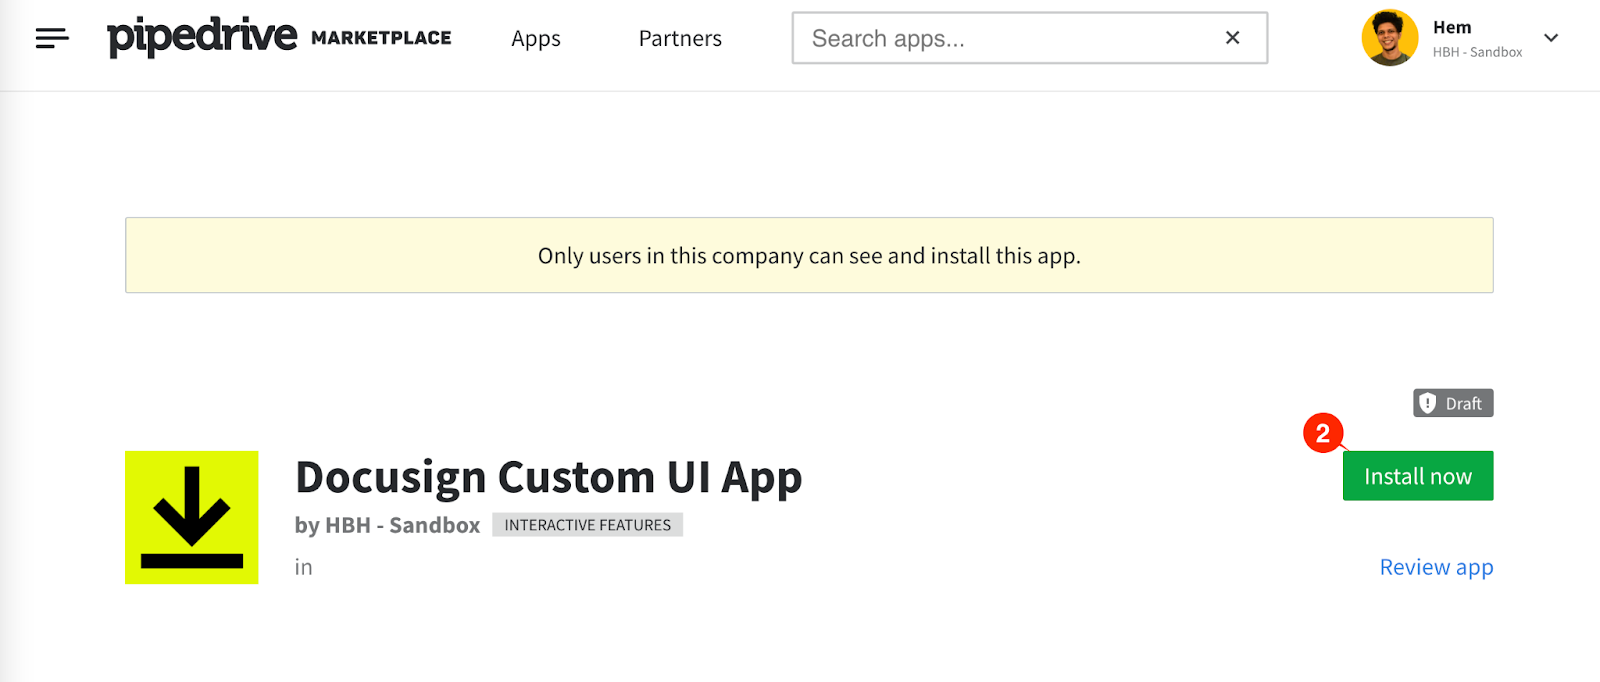
The UI responsible for the settings page can be located in the /views/settings.hbs file. To install the app, click on the Preview link shown next to the App from the Developer Hub.

Click on the Install Now button on the next screen that appears.
Upon successful authorization, you'll be automatically taken to the App Settings page. Once you are there, make sure you provide the DocuSign Account ID and Temporary Access token that you noted down earlier.
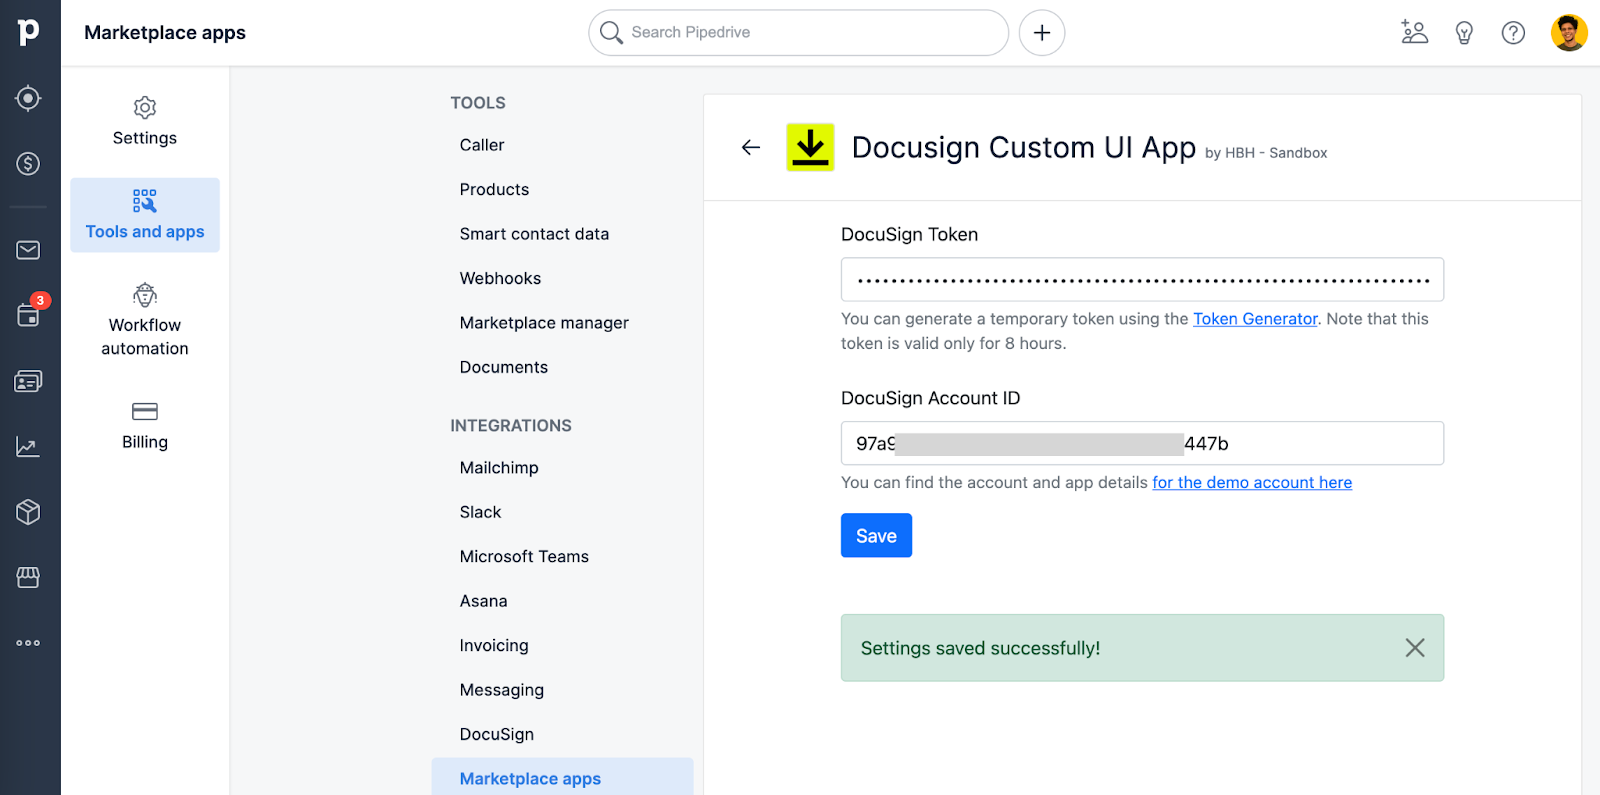
Upon saving, the settings page details are written as JSON in the database for that account. An account is identified by the company_id parameter. You can also visit the same page even after installation to update the settings.
6. Listing the templates using Panels
In the DocuSign setup stage, we would have already created a couple of templates (If not, make sure there's at least one). These templates could be any documents that are accepted as valid input by DocuSign (PDF/ Docx / Image files, etc). You can also create a sample role (say, Signer) associated with the template.
Here's a sneak peek of the Custom UI Panel:
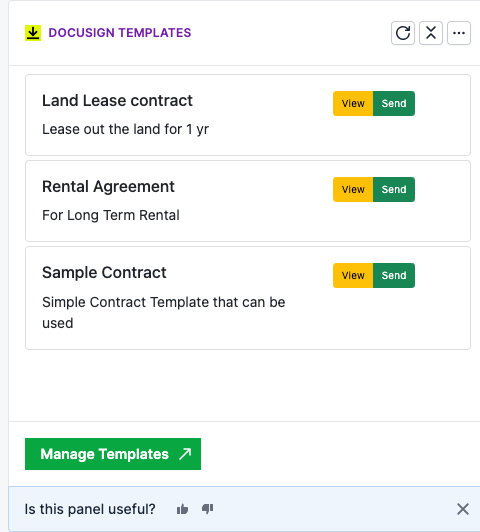
Since we have specified the IFrame URL for the panel and the location where it is to be rendered (Deal Details), opening any deal detail view will make an API call to the app. As you see from /server/routes/ui.js, the panel.hbs file is used to render the view. However, there a few things happening behind the scenes:
- A request is made to the Panel IFrame URL with the following details in the query params -
resource=deal&view=details&userId=xxx&companyId=xxx&selectedIds=xxx&id=CTJ_VrcYpi&data=true&token=[JWT_Token] - We parse the
companyId,selectedIds(Deal ID) from the query parameters and obtain the settings associated with the company. - We then make use of the credentials to make a REST API call to DocuSign to list the templates.
- The template data is passed as a context to the
panel.hbsfile to list them. Each list item has couple of buttons. - Clicking on the buttons perform the appropriate action. For instance, clicking on the Send button retrieves deal contact information and sends the template for signing.

We also make use of snackbars to convey the status accordingly.
7. Previewing templates using Modals
Custom UI Modals appear as overlays over the entire deal details section. In our case, every time the Preview button is pressed, we make an API call to generate a preview URL. Technically this makes use of DocuSign's createEditView REST API.
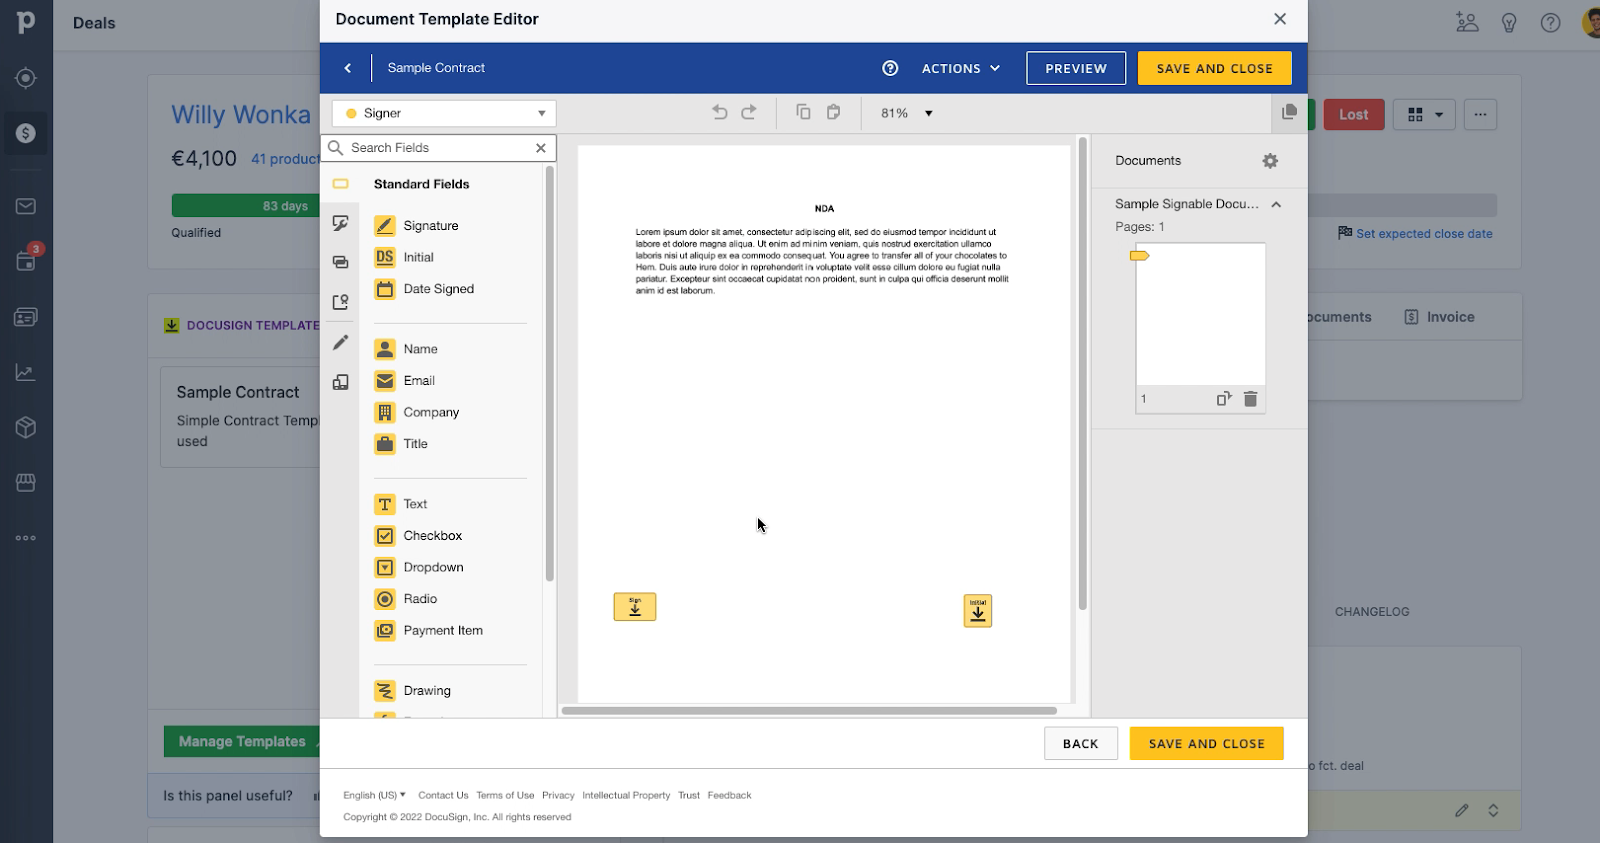
The DocuSign's createEditView REST API returns a URL that enables you to embed the edit view of the DocuSign UI in your applications. This is a one-time use login token that allows the user to be placed into the DocuSign editing view. A similar approach could be taken for signing documents from within Pipedrive regardless of the e-signature product.
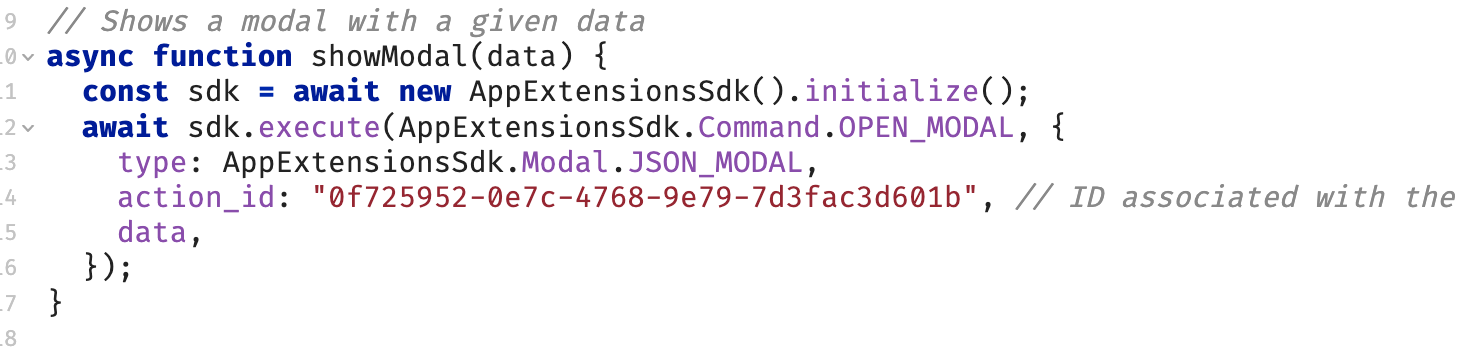
An important thing to note is the way we invoke the modal. We would require either the Modal Name or ID to successfully invoke the modal. User-defined context could also be shared along with modal ID during the invocation. This is passed as stringified JSON via the URL parameters to the modal.
8. Your Turn
So far, we have seen how to integrate DocuSign with Pipedrive using Custom UI Extensions and REST APIs. This approach could be extrapolated to integrate any Contract / Document Management solution inside Pipedrive. Additionally, the current use case can be extended to
- Obtain signatures within Pipedrive
- Make use of Pipedrive's Files and Attachments endpoints to dynamically create templates
- Integrate with third-party document management systems such as Google Drive / Box / Onedrive, etc.
- Extend to multiple other Custom UI locations depending on the scenario and relevance to other entities such as Persons & Organizations.
The possibilities are endless. Hope you enjoyed the tutorial. We are looking forward to hearing from you!